


Introduction to How to Delete or Deactivate Users in AcceleratorApp
When managing your community, you may need to remove or restrict access for some users. AcceleratorApp gives you two options: permanently deleting a user, or deactivating their account while preserving their data.
Deleting a user is permanent and irreversible. The impact on associated data varies depending on the user's role — review the role-specific effects below before proceeding.
Where to Find User Management
There are two ways to access User Management:
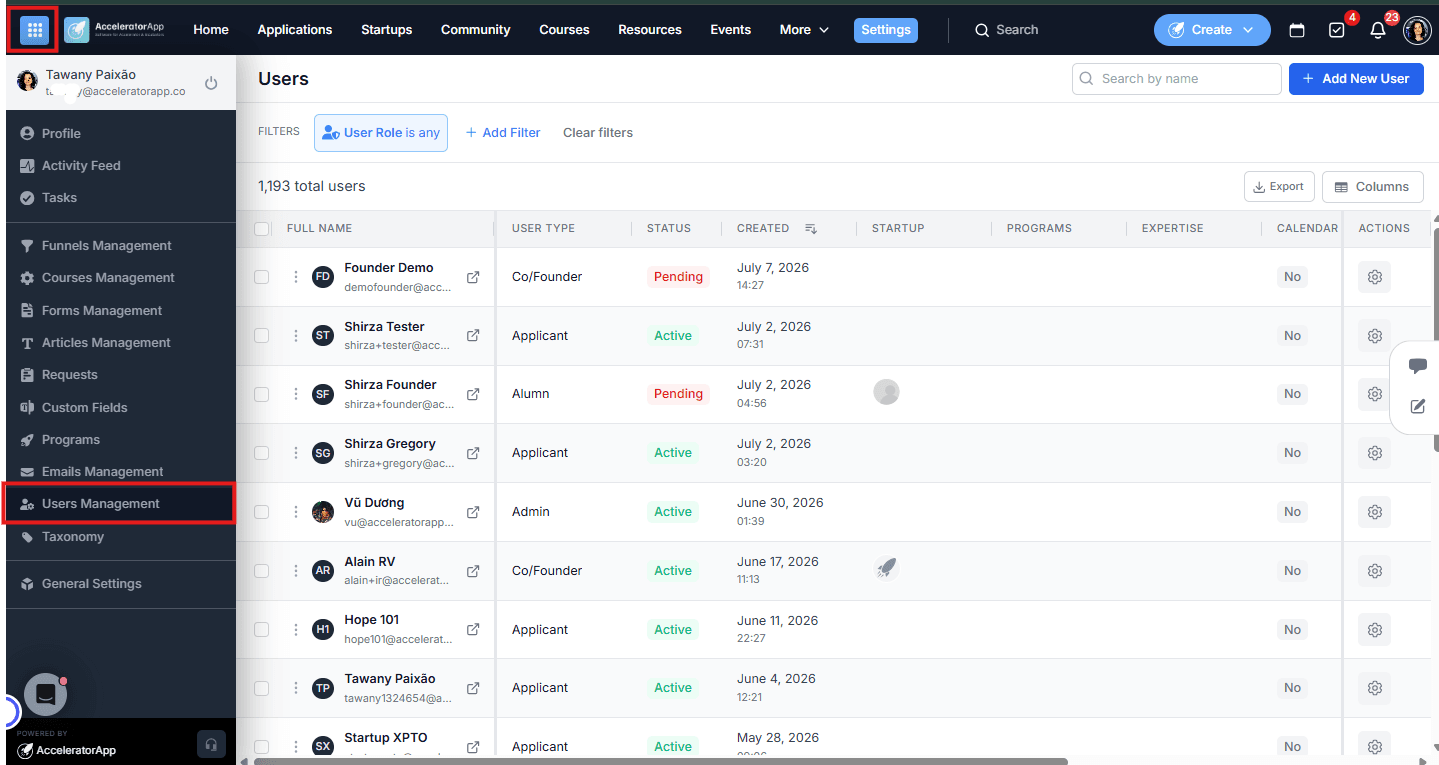
- From the top-left menu icon — select User Management from the main navigation.
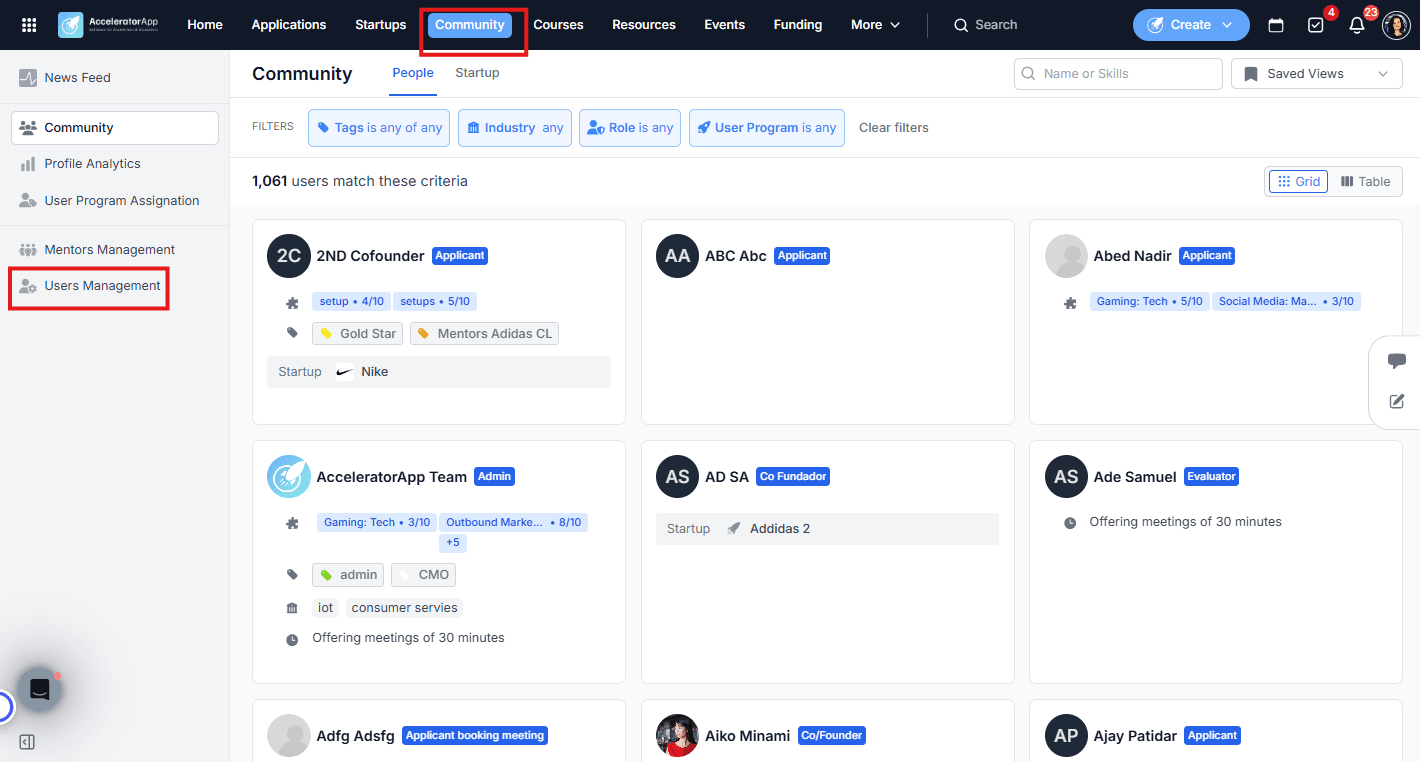
- From the Community section — click on Community in the top menu, then select User Management from the left sidebar.
What Happens When You Delete a User
The impact of deleting a user depends on their role. Review the relevant case before proceeding:
- Applicant or Founder (with co-founders) — the application is not removed. The deleted user's name and email are replaced with "Unknown," but the application record and all associated data remain intact. If the startup has more than one co-founder, the startup profile is preserved.
- Founder (sole co-founder of a startup) — if the deleted user is the only co-founder of a startup, the startup is also permanently deleted along with all its associated data.
- Evaluator — the evaluator's account is removed and all evaluation data submitted by that user is also permanently deleted.
- Other user roles (mentors, staff, coaches, community members) — the user account and all associated profile data are permanently removed.
Step-by-Step
1. Find the User
Use the search bar to find the user by name or email, or use the filters to narrow down by user role, status, tag, industry, or program.
2. Open User Options
Click the gear icon in the Actions column next to the user you want to manage.
3. Delete the User
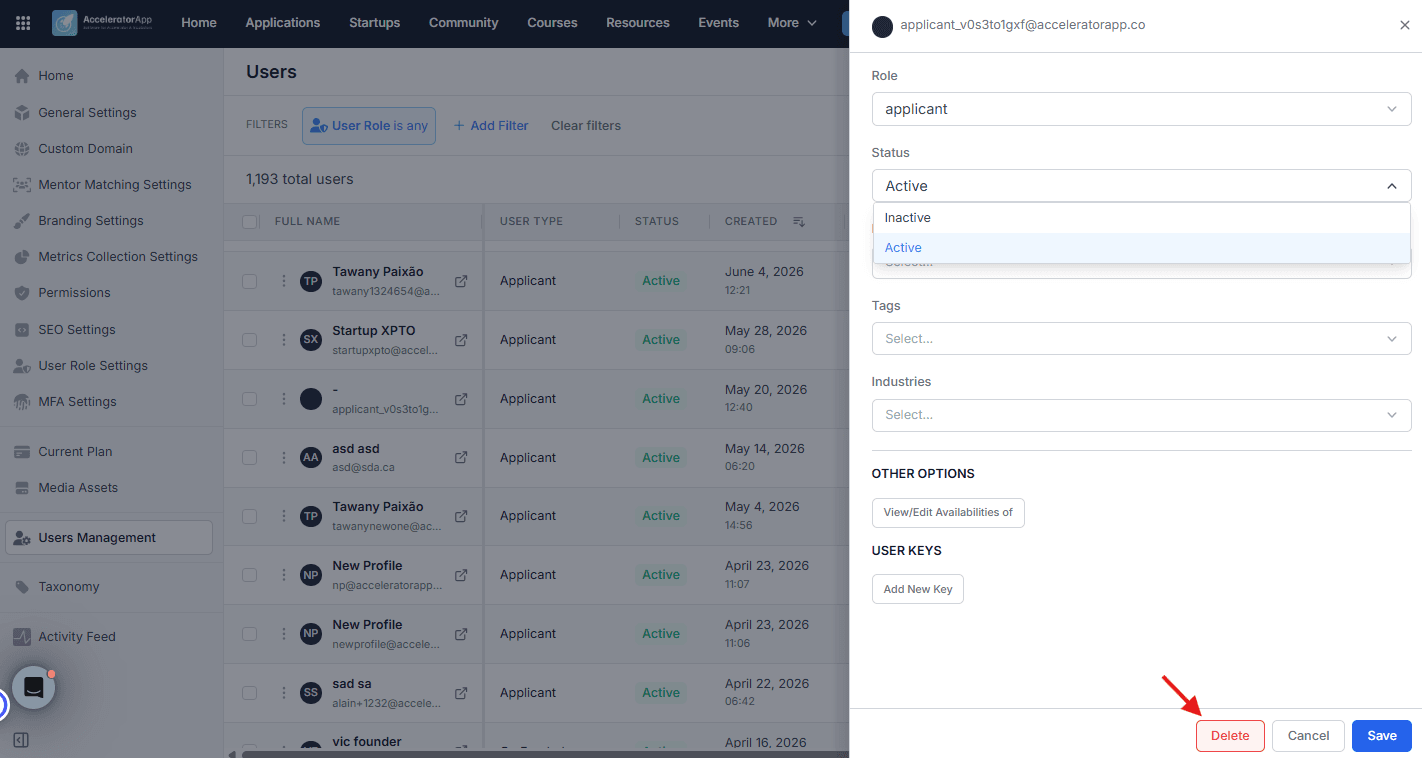
In the side panel that opens, scroll down and click Delete. Confirm the action when prompted.
This action cannot be undone. Review the role-specific effects above before confirming.
4. Deactivate or Archive a User (Recommended Alternative)
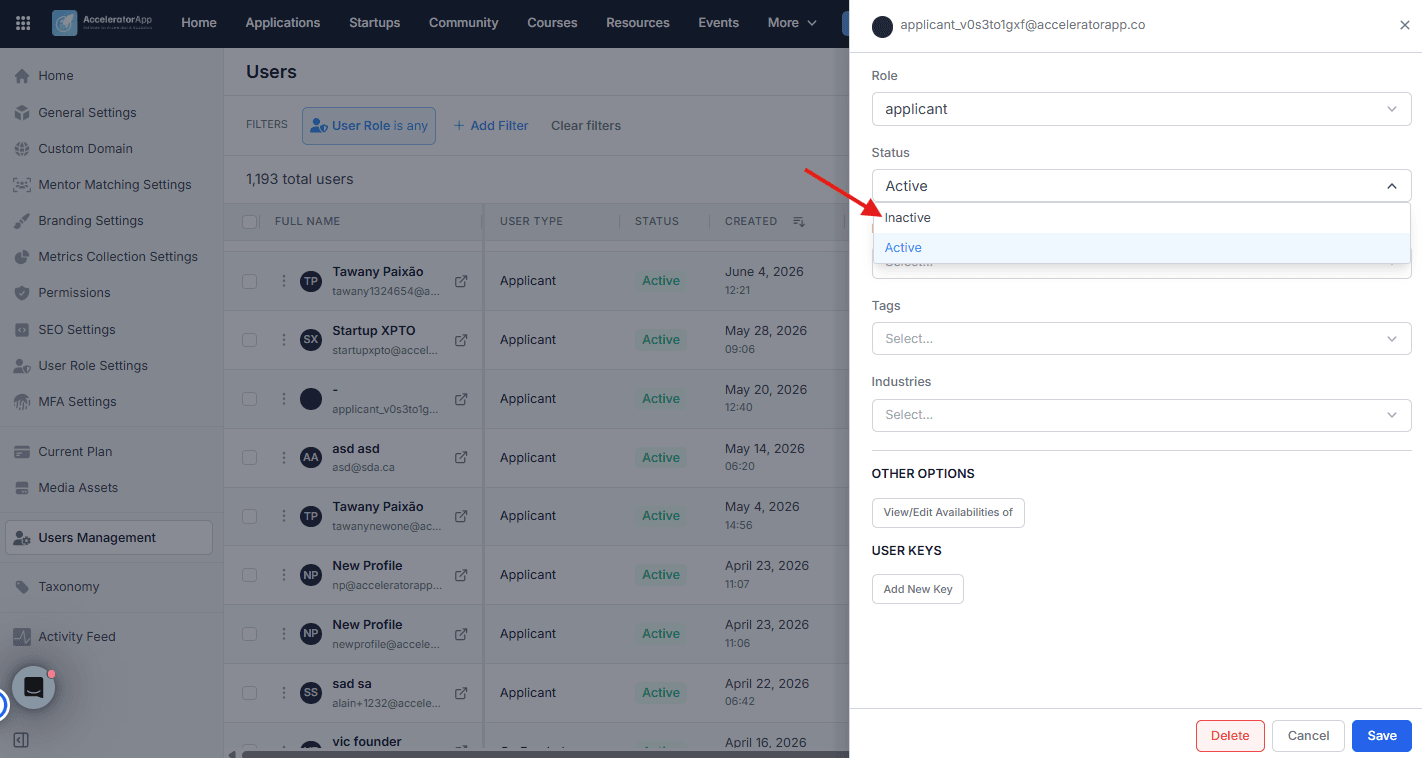
If you want to restrict a user's access without losing their data, change their status to Inactive instead of deleting them. An inactive user cannot log in or access the platform, but all their information is preserved and can be reactivated at any time.
To deactivate a user, open the gear icon in the Actions column, locate the Status field, and switch it to Inactive.
Best Practices
- Default to Inactive over Delete. Unless you are certain the user's data is no longer needed, deactivating is the safer choice — it is reversible and preserves the full history of that user's activity on the platform.
- Be especially careful when deleting sole founders. If the user is the only co-founder of a startup, deleting them will also permanently delete the startup and all its data. Make sure this is intentional.
- Check evaluator data before deleting. Deleting an evaluator permanently removes all evaluation data they submitted — review whether this data is still needed before proceeding.
- Check for active responsibilities before deleting. Make sure the user has no pending evaluations, assigned coaching sessions, or ongoing tasks before permanently removing them.
- Use deletion for duplicates and data hygiene. Deleting duplicate accounts or clearly erroneous entries helps keep your database accurate and easier to manage.
- Use filters to find users efficiently. Filter by status, role, or tag to quickly surface the users you need to manage without scrolling through the full list.
Additional Resources
- Introduction to User Management
- How to Customize User Roles?
- How to Assign Users to Programs